Make it Monday: DIY Flowers for your Bridesmaids
When I got married, almost five years ago (WHOA!), I didn’t have much for funds but I wanted to give them each a little something. So I headed over to Etsy.com and found each some earrings that they all wore on the wedding day. Had I been more DIY minded I would have made them something cute like these flowers.
My very DIY bride, Hannah, and her mother, Francee, made these amazing flowers for all of Hannah’s friends. She opted not to have bridesmaids but wanted to make sure they knew they were important in her life. All the grils who got flowers, took it upon themselves to wear colors that matched the wedding and were adorned with these amazing flowers on the big day. It was fantastic!

I’ll be posting the wedding photos tomorrow! So check back for more great DIY projects then!
These are uber easy to make. They do require some attention, because it involves FIRE! Yes that’s right, fire breathing dragons. Ok, just a lighter. I have to use the big gun looking ones because, fact, I cannot use cigarette lighters to save my life.

Down to brass tacks.
What you’ll need:

- Synthetic fabric in as many colors as you like! (I used polyester satin, only 1/4 yard of each)
- Sharp scissors
- Lighter
- Needle and thread
- Cute button
- Glue gun
- Aligator clip
Step 1: Cut out your circles in decreasing sizes. I did not use a template so it had a more organic look to it. But you can totally trace around different size glasses. My starting circle was three inches across.

Step 2: Burn the edges of each of your circles. Press your thumb in the center of the circle to flip the edges upward. One tip, as your turn it try and curve up the edge in the direction you want (make sure you don’t burn your sweet little fingers!)

Step 3: Layer the circles in a pleasing way. I turned mine so each layer showed enough color so you know it’s there.

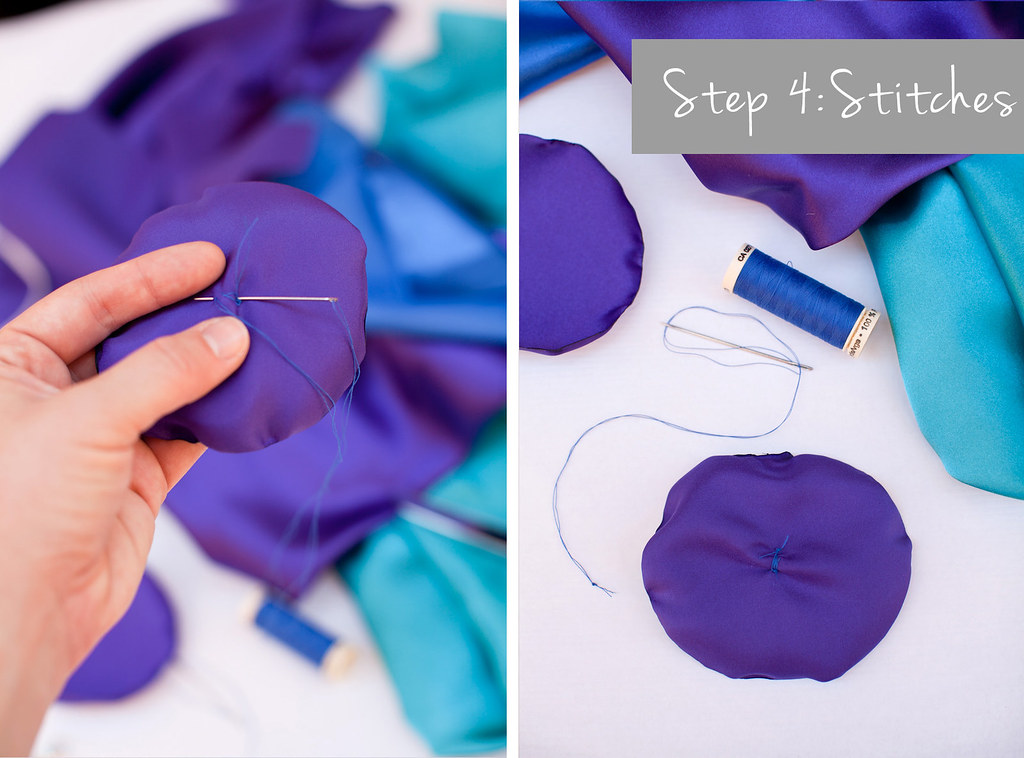
Step 4: Stitch on the button and knot it. I pulled mine tight so it cinched in the back a bit and pulled the tiniest layer into a small bunch to make it look for flowery.
Step 5: Glue on the aligator clip or bobbi-pin if you like!

Step 6: Wear it or give it away!

More layers makes it more flowery. I love them! Don’t be surprised if you get one for Christmas this year, sisters!
What do you think of this DIY project? Is it doable? Have an event, wedding, shower, birthday or otherwise? Stuck on something you need for the soiree, i.e. favors, place cards, decor, tablescapes, etc? Let me know your color scheme and theme and I’ll give it a whirl. Who knows your project could be featured next! Love the idea but don’t have time to make it? Email me and I’ll give you a quote (meg at megruth dot com).